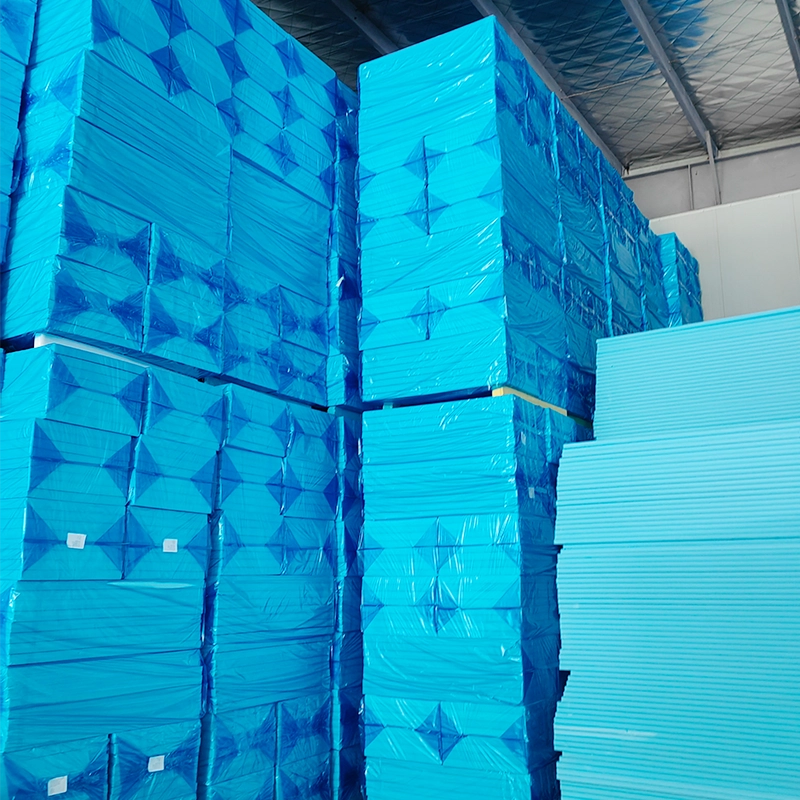
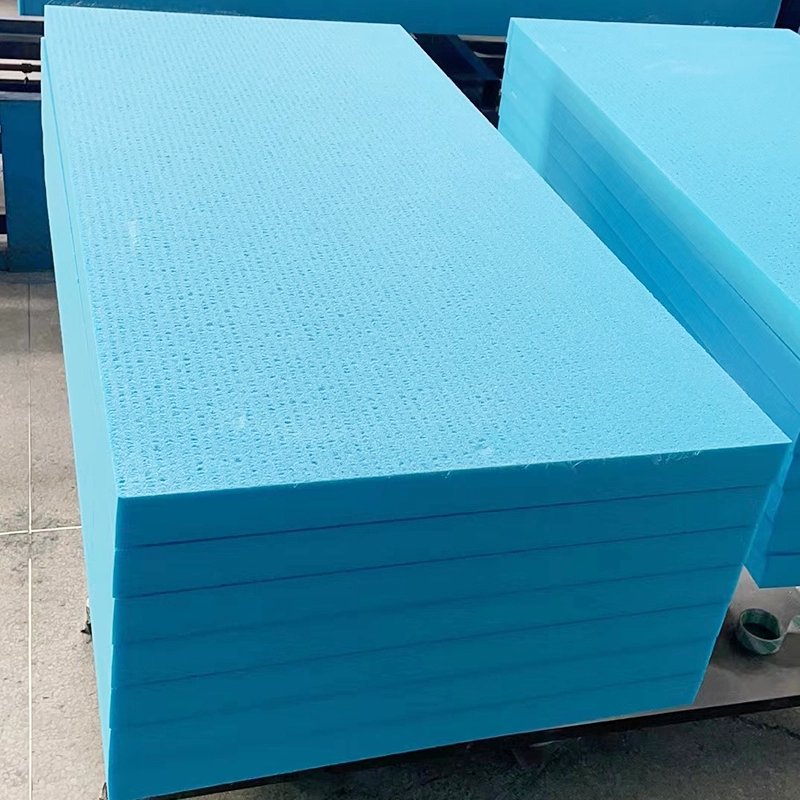
Home insulation is one of the most impactful ways to improve energy efficiency, reduce heating and cooling costs, and increase overall comfort. For DIY enthusiasts, choosing the right material is critical to ensuring both effectiveness and ease of installation. Expanded Polystyrene (EPS) is a versatile and cost-effective option, widely used for its thermal efficiency, lightweight nature, and straightforward installation process.
Why Choose Expanded Polystyrene (EPS) for DIY Insulation
Thermal Efficiency: How EPS Outperforms Other Materials
Expanded Polystyrene (EPS) is a highly efficient thermal insulator due to its closed-cell structure, which traps air and reduces heat transfer. Compared to materials like fiberglass or mineral wool, EPS provides consistent thermal resistance (R-value) across varying conditions. This stability makes it particularly suitable for DIY applications where precise professional installation may not be feasible. Additionally, EPS does not settle over time, ensuring long-term insulation performance, which is a critical factor for homeowners seeking energy savings and a comfortable indoor environment.

Cost-effectiveness of EPS for Home Insulation
EPS panels are generally more affordable than spray foam or rigid polyisocyanurate boards, making them a favorite among DIYers working within a budget. The combination of low material cost, ease of handling, and reduced need for professional installation can result in significant savings over time. Additionally, EPS’s longevity ensures that the initial investment pays off through lower energy bills and minimal maintenance requirements, making it one of the most economical insulation choices for DIY projects.
Lightweight and Easy-to-Handle Properties
One of the main advantages of Expanded Polystyrene (EPS) is its lightweight nature, which simplifies transportation, cutting, and positioning during installation. Unlike heavier insulation boards or spray foams that require specialized equipment, EPS can be handled by a single person, reducing labor time and physical strain. This property also allows for more precise placement, ensuring tight seams and optimal coverage, which is critical for achieving maximum thermal efficiency in a DIY setting.
Tip 1: Proper Planning and Measurement for EPS Installation
Assessing Your Space: Walls, Attics, and Floors
Before installing EPS insulation, it is essential to evaluate the areas to be insulated. Walls, attics, and floors each present unique challenges, including variations in surface texture, obstructions, and exposure to moisture. Conducting a thorough assessment allows you to determine the required panel dimensions, identify any potential barriers, and plan for the correct sequence of installation. Proper space assessment reduces errors, ensures optimal coverage, and minimizes material waste.
Measuring and Cutting EPS Panels Accurately
Accurate measurement and cutting are crucial for a successful EPS installation. Panels should fit snugly without leaving gaps, which can compromise thermal performance. Using a straightedge and a fine-toothed saw or a hot-wire cutter can help achieve precise cuts. Always account for expansion and contraction due to temperature changes, and avoid forcing panels into spaces, as this may lead to cracking or warping.
Tools You’ll Need for a Smooth Installation
To ensure a smooth DIY EPS project, gather essential tools in advance. These include measuring tape, level, utility knife, hot-wire cutter, adhesive or screws, and a straightedge. Additionally, gloves, safety goggles, and a dust mask are recommended for personal protection. Having all tools ready before starting reduces interruptions and enhances installation accuracy, making the process more efficient and less prone to errors.
Tip 2: Surface Preparation for Maximum Insulation Performance
Cleaning and Drying the Installation Surface
Surface preparation is often overlooked but is critical for ensuring long-lasting adhesion and performance of EPS insulation. All surfaces must be clean, dry, and free of dust, debris, or old adhesives. Moisture or dirt can prevent proper bonding, leading to gaps, sagging, or even panel detachment over time. For walls or ceilings, consider wiping down with a mild detergent solution and allowing sufficient drying time before beginning installation.
Repairing Gaps, Cracks, and Uneven Areas
Uneven surfaces, cracks, or holes can compromise the effectiveness of EPS insulation by creating thermal bridges. Before installation, fill gaps with compatible fillers or caulking and smooth uneven areas with a leveling compound. Properly prepared surfaces ensure panels fit tightly, maximizing thermal performance and preventing drafts or energy loss. This step is especially important in older homes, where wall irregularities are more common.
Choosing the Right Adhesives and Fasteners
Selecting the correct adhesive or fastener is essential for securing EPS panels. Use adhesives designed for foam insulation to avoid chemical reactions that may degrade the material. Mechanical fasteners, such as insulation anchors or screws, may also be used to reinforce stability, particularly on ceilings or vertical surfaces. Combining adhesive and mechanical fastening ensures panels remain firmly in place for years, maintaining insulation efficiency and preventing costly repairs.
Tip 3: Installation Techniques for DIY EPS Insulation
Staggered vs. Continuous Panel Placement
Panel placement affects both thermal efficiency and structural stability. Staggered installation, where seams do not align vertically, minimizes heat loss through joints and creates a stronger overall structure. Continuous panel placement may be simpler but can create linear thermal bridges along the seams. For DIY projects, staggering EPS panels is a recommended best practice to enhance insulation performance without adding complexity.
Sealing Joints and Preventing Thermal Bridges
Even minor gaps between EPS panels can lead to significant energy loss. Sealing joints with foam tape, caulk, or insulation spray prevents air infiltration and enhances thermal performance. Attention to detail around corners, edges, and utility penetrations is vital. Properly sealed joints ensure the insulation system functions as intended, keeping indoor temperatures stable and energy bills lower.
Handling Corners, Edges, and Irregular Shapes
Corners, edges, and irregular surfaces require careful cutting and fitting to avoid gaps. Use a utility knife or hot-wire cutter to trim panels to precise dimensions. For rounded or irregular areas, flexible EPS sheets or custom-cut pieces may be needed. Taking time with these challenging spots ensures a uniform barrier, reducing heat loss and maintaining the integrity of the insulation system.
Tip 4: Safety and Environmental Considerations
Personal Protective Equipment (PPE) When Handling EPS
While EPS is non-toxic, cutting and sanding can create fine particles. Wearing gloves, a dust mask, and safety goggles protects your skin, lungs, and eyes. Adequate ventilation is also recommended during cutting to avoid inhalation of dust. Prioritizing safety minimizes the risk of irritation and ensures a smooth installation experience without health hazards.

Fire Safety and Local Building Codes
EPS is flammable and must be installed in accordance with local fire codes. Applying fire-resistant coatings or using protective cladding can reduce fire risk. Check building regulations for your region to ensure compliance with insulation standards, particularly in attics and wall cavities. Following safety guidelines protects your home and enhances the long-term viability of your DIY insulation project.
Disposal and Recycling of EPS Waste
EPS insulation generates waste during cutting and trimming. Proper disposal or recycling reduces environmental impact. Many municipalities offer recycling programs for EPS, and some suppliers accept offcuts for reuse. Minimizing waste and recycling scraps not only benefits the environment but can also reduce project costs by reusing leftover material in other areas.
Tip 5: Maintaining and Optimizing EPS Insulation Over Time
Inspecting for Moisture or Damage
Regular inspection ensures that Expanded Polystyrene (EPS) maintains its thermal performance. Look for signs of moisture, mold, or physical damage, particularly in areas prone to leaks or high humidity. Early detection allows for timely repairs, preventing energy loss and potential structural issues. Maintaining a consistent inspection schedule maximizes the lifespan and efficiency of your insulation investment.
Adding Layers or Reflective Foils for Enhanced Efficiency
For optimal performance, consider layering EPS panels or adding reflective foils on top. Reflective foils reduce radiant heat transfer, further improving energy efficiency. Layering increases overall R-value without significant structural changes. These enhancements can make a noticeable difference in both winter and summer performance, providing comfort and cost savings year-round.
Cleaning and Minor Repairs Without Reducing Performance
EPS panels are low-maintenance but may require occasional cleaning or minor repairs. Use a soft brush or vacuum to remove dust, and fill small gaps with compatible insulation foam. Avoid using harsh chemicals that can degrade EPS. Proper care ensures long-term performance, maintains indoor comfort, and prolongs the lifespan of your DIY insulation system.
Comparing EPS with Other Insulation Materials
EPS vs. Fiberglass: Cost, Performance, and DIY Ease
EPS offers superior durability and moisture resistance compared to fiberglass, which can sag or absorb water over time. Fiberglass may be easier to cut but requires protective clothing due to irritation risk. EPS provides a balance of ease, performance, and longevity, making it ideal for DIY projects.
EPS vs. Spray Foam: Longevity and Installation Complexity
Spray foam offers high insulation values but is expensive and challenging to install correctly without professional equipment. EPS is easier for homeowners to handle, provides predictable performance, and allows for incremental installation at lower cost.
Table: Quick Comparison of Common DIY Insulation Materials
| Material | R-Value per Inch | Cost | DIY Complexity | Moisture Resistance | Longevity |
| EPS | 4.0 | Low | Easy | High | 30+ yrs |
| Fiberglass | 2.5–3.5 | Low | Moderate | Low | 20–25 yrs |
| Spray Foam | 6.0–7.0 | High | Difficult | High | 30+ yrs |
Conclusion
DIY insulation with Expanded Polystyrene (EPS) is a practical, cost-effective way to enhance your home’s energy efficiency. By following expert tips on planning, surface preparation, installation, safety, and maintenance, you can achieve professional-level results without hiring contractors. EPS provides excellent thermal performance, ease of handling, and long-term durability, making it a top choice for homeowners seeking effective DIY insulation solutions. Proper planning, attention to detail, and adherence to safety guidelines are key to a successful project that delivers lasting comfort and energy savings.
FAQ
Can EPS insulation be installed over existing walls?
Yes, EPS can be installed over existing walls, provided the surface is clean, dry, and structurally sound. Consider using adhesive and mechanical fasteners for secure placement.
How thick should EPS panels be for optimal insulation?
Thickness depends on climate and R-value requirements. For most residential applications, 1–2 inches of EPS provides noticeable energy savings, but combining layers or using reflective foils can enhance performance.
Is EPS environmentally friendly?
While EPS is made from petroleum-based products, it is recyclable and long-lasting, reducing overall environmental impact when properly maintained and recycled.
How long does DIY EPS insulation typically last?
With proper installation and maintenance, EPS insulation can last 30 years or more, retaining its thermal performance and structural integrity.
Can I paint or cover EPS panels after installation?
Yes, but avoid solvent-based paints that can degrade EPS. Use water-based paints or cover panels with drywall or other non-reactive materials.


